
Getting Started
This is a handy page of hints and tips for using ESPC Legal once your firm has signed up. We will outline the basics of logging in, creating your transaction, uploading documents and submitting observations. Plus some other useful hints for getting the most out of the system!
P.S. Check out our Tech Tips page if you’re having technical difficulties!
Setting up your transaction; easy as 1 2 3!
Once you’ve logged in using either your username/password or your Law Society SmartCard, head to the Menu on the left where you will see a tab entitled ‘Transactions’. Within this tab you will be given the option to create a new Selling or Purchasing transaction, select the applicable type and fill in the wizard steps! Then voila, you should have your case file up and running! The other side will receive a notification to transact with you at this point.
Tidying and Editing
When you get started on your transaction we’d recommend you do a little bit of housekeeping and double checking!
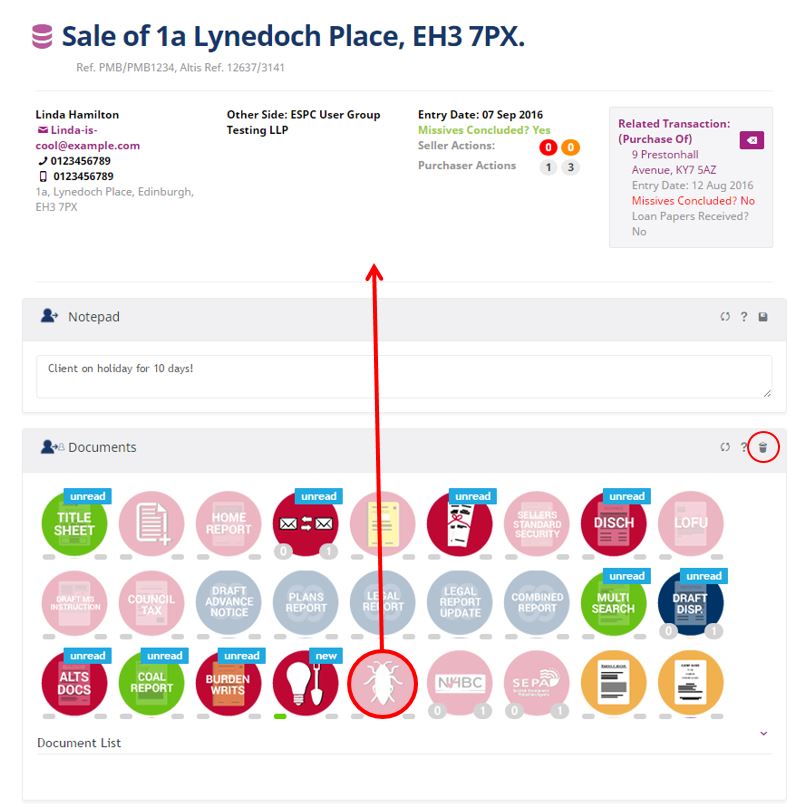
By housekeeping, we mean tidying up the document section of the transaction. This section contains an icon for each different document type, if for example, you know that the property is not a new build, you can drag the new build documentation icon out of the widget and it will disappear so you’ll know you don’t need it. The system will also remove it from the other side of the transaction too, so the solicitor on the other side will also know that that document is not required. If you find out you need it back, it will live in the little dustbin on the top right hand side of the widget!
The screen is created by a series of boxes called ‘Widgets‘, we’d also recommend to give these a wee shuffle around to suit your work flow and your preferred order. These Widgets are moved around by clicking on the top bar and dragging them around the screen. They can be full screen width or half screen width. The system will remember the order you set them in so every transaction will have the same order on a user by user basis.
We’d also recommend double checking your transaction details are present and correct, just so that you know that any documents you create will be populated with the correct info!
Uploading Documents – so many options!
There are three ways to get a document into the document section on the transaction screen; the following two are how to upload an existing document.
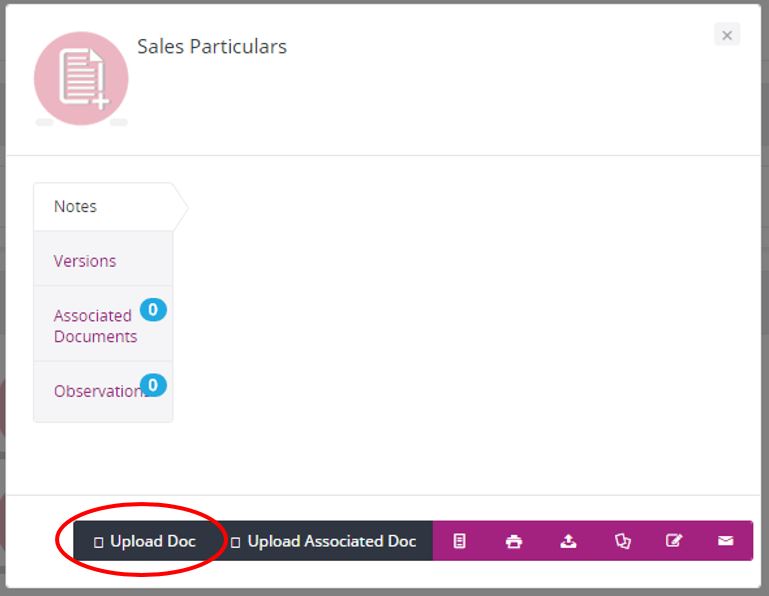
The first way is to head into the relevant icon in the document section and click on ‘Upload Doc’ from the tool bar along the bottom of the pop up box. This will them take you into the local files on your computer where you will be able to select the document you wish to upload.
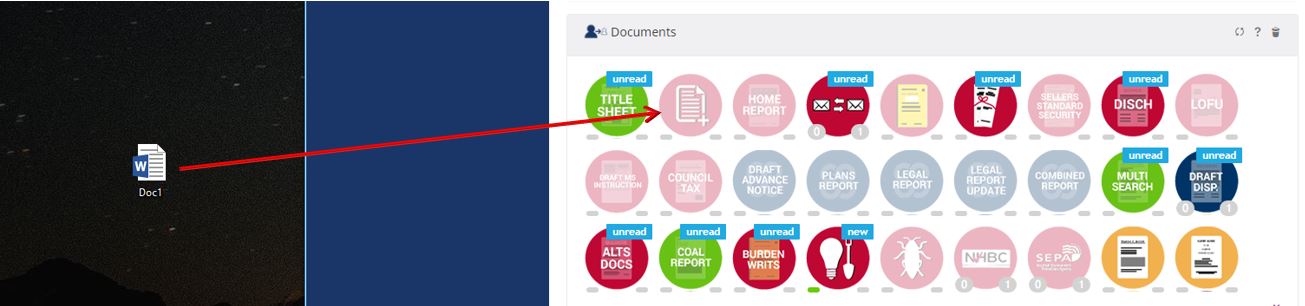
The second way is to drag and drop the icon from another window or from your desktop. This is a particularly quick way to upload documents!
Both methods will prompt the system to ask you what type of document it is ‘Main’ (shared) or ‘Associated’ (not shared) and whether you’d like to rename the document.
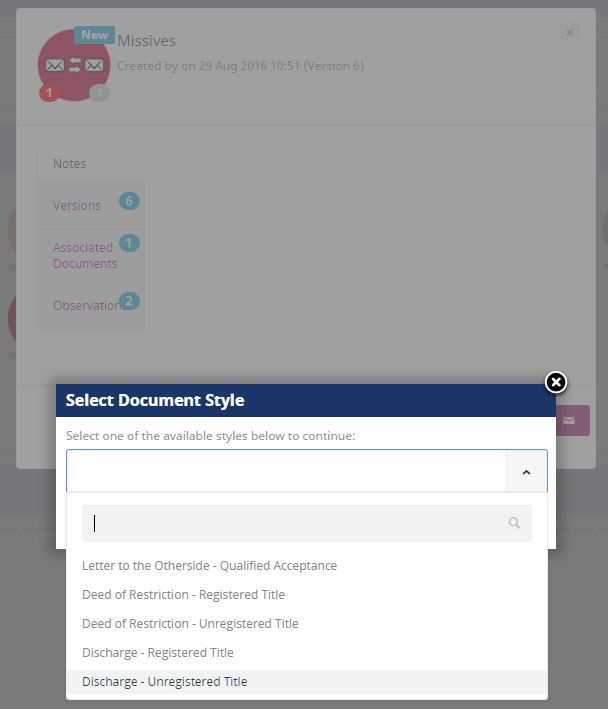
The third way to get a document into the document section is our favourite; by creating one! ESPC Legal has a style bank of 250 standard email, letter and document templates that automatically prepopulate with the information you have stored on the transaction. To do this, head to the tool bar on the top right of the screen, or the relevant document icon. Then click the ‘create document from style’ icon. You will then be shown a list of documents that you are able to create. Select the document type and follow the steps, you will have a chance to amend the document before you save it!
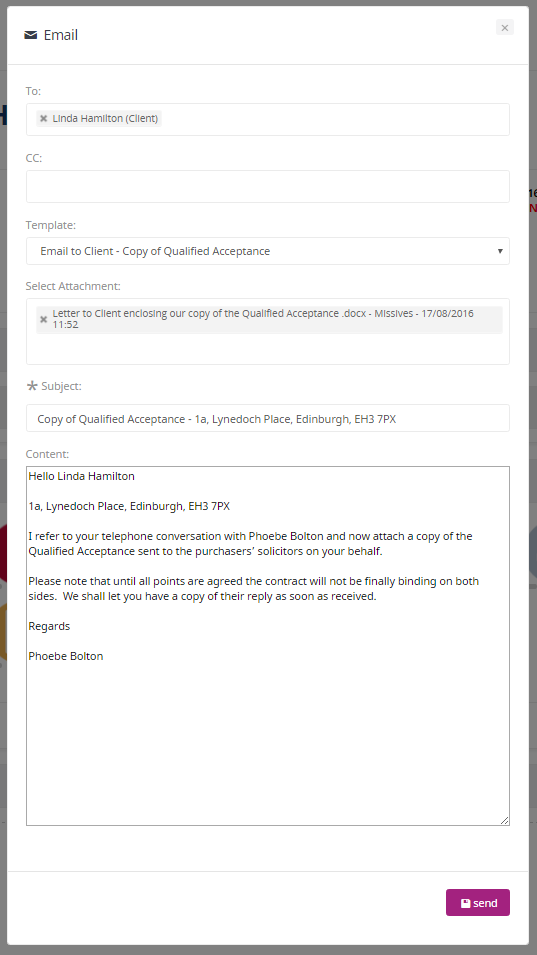
Sending an email
When on the transaction page, there are a couple of places where you can find the link to send an email, however the most obvious is the one where your client details are, on the top left of the screen. By clicking on your client’s email address is (shown in purple) you will open up an email dialogue box, this will ask you to fill in the details of your email, and then you are able to add the content. We have added a selection of standard email styles for you to choose from, as well as giving you the option to compose your own email. The styles are also intuitive so for example, if it says ‘I have attached a copy of xyz.’ the system will know what ‘xyz’ is and will attach a copy automatically for you. Easy Peasy!
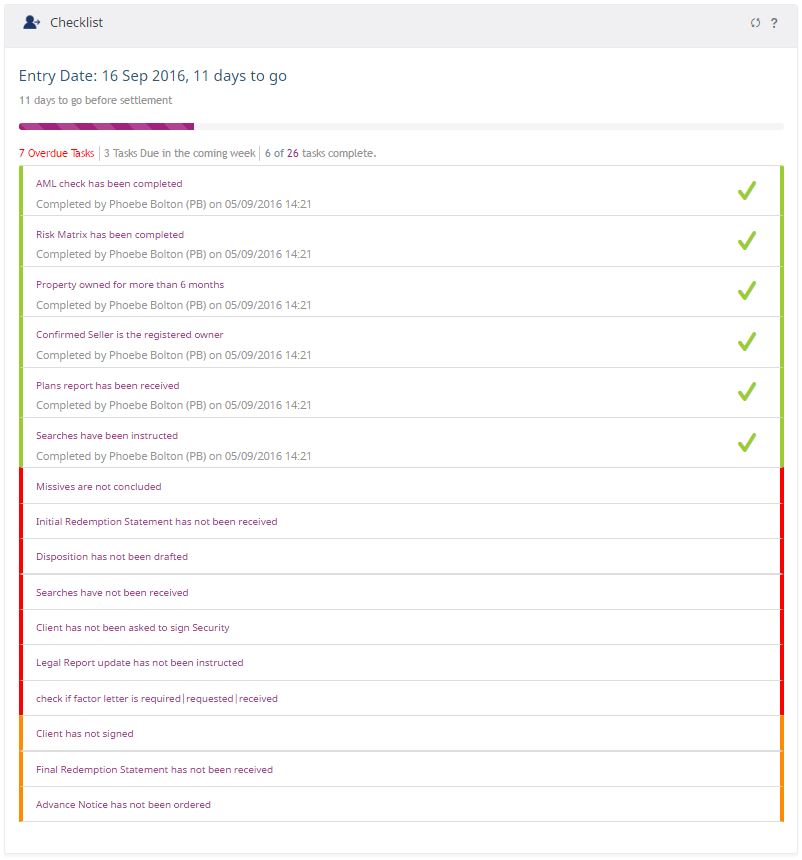
conveyancing Checklist – Keeping you right!
This feature shows once on the transaction summary under the ‘expand’ icon, and again on the transaction itself in its own ‘Checklist’ widget. This feature is essentially a list of tasks that the system would expect for you to complete over the course of the transaction. It counts down towards date of entry and shows tasks in Red if they should have been done already, Amber if they are due to be done in the next 7 days, and Green if they have been completed.
Still struggling?
If these tips still haven’t quite answered your query, or you’d like us to explain anything to you, please don’t hesitate to get in touch with our Customer Service Team by calling 0131 297 3210 or emailing help@espclegal.com. The team are available from 9am to 5pm, Monday to Friday.